Showing posts with label Lily of the Valley. Show all posts

Thursday, May 9, 2013

Mother's Day - Cho with Parasol


Happy Thursday!  I finished my second Mother's Day card today and this one will be for my Mother In-Law.  The card is really an over-sized tag inside of an envelope of sorts.  I copied an original design by Dena Concienne, you can find her blog HERE.  She does great work so stop on by her blog and check it out.

I used Cho with Parasol by Lily of the Valley and I didn't have any square or rectangle doilies so I made mine using a Martha Stewart punch around the page paper punch and then embossed the cardstock with a pretty design.

Here is my card/tag...Enjoy!

Envelope with Tag inside

Tag

Envelope with Tag removed


My Project Recipe:
     Stamps - Cho with Parasol by Lily of the Valley and Because of You by Verve Stamps
     Paper - Bazzill White and The Sweetest Thing - Bluebell by My Mind's Eye
     Flowers - Wild Orchid Crafts and Petaloo
     Paper Punches - Branch & Deco Fans by Martha Stewart
     Metal Die - Swirl by DooHickey, Label Stacklets 3 by Taylored Expressions, Petite Scalloped Circles
          Small by Spellbinders, Nesting Circles by Lifestyle Crafts and Butterfly by Cheery Lynn Designs
     Embossing Folder - Cuttlebug by Provo Craft
     Inked Edges - Distress Ink Vintage Photo
     Sparkle & Shine - Stickles Star Dust and Glossy accents by Inkssentials
     My Stash - Pearls and Lace

Colored in Copics:
Face E0000, E00, R01     Hair E50, YR30, E31
Pink RV91, E04
Blue BV70, BV72
Gold Y32, Y21, Y26
Yellow Y00, Y13
Brown E41, E43
Green G21, YG03
Outline Dots C00, C1


Thanks for stopping by...

Hugs...


Thursday, January 3, 2013

James Bear Deck the Halls

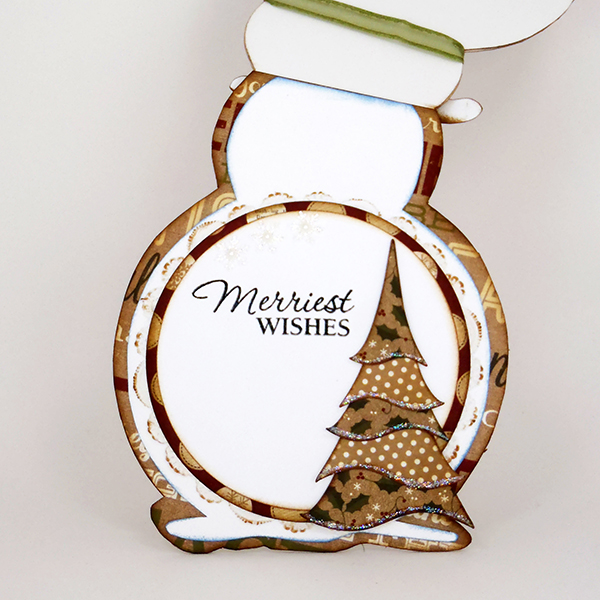
Good Morning!  I've finished another "late" Christmas card today...I'm still making them for next Christmas!  This one is using the James Bear Deck the Halls stamp from Lili of the Valley, you can find them HERE.  The card shape is made using a large die from Go Kreate which you can find HERE.  I love their dies because they make die sets large enough for a nice 6x6 card, but you do need to have a Grand Calibur by Spellbinders to cut them out because the dies are to large for the Cuttlebug.

I am still using the Homemade Holidays 6x6 paper pack...I have enough paper left for one more card I think!!!  Amazingly I was able to make 5 different cards with this one 6x6 paper pack.  I LOVE these paper packs because they are already color coordinated for me and some, like this one, have little card tags included.  So much faster than trying to decide on my own papers one by one...

Here is my card for today...enjoy...

Front of card

Inside the card

Close-up of Copic Coloring...Bear is done with dots instead of strokes!

My Card Recipe:
     Stamps - James Bear Deck the Halls by Lili of the Valley, Bright Spirits by Verve and Christmas
          Mini Icon Tags & Christmas Sentiment Tags by Lili of the Valley
     Paper - Bazzill White & Read, 6x6 Paper Pad Handmade Holiday by Simple Stories
     Flowers - Wild Orchid Crafts & Petaloo
     Paper Punches - Snowflakes and Garden Trellis by Martha Stewart, Leafy Branch by CCDesigns
           and Vintage Leaf by DooHickey
     Metal Die - Label Stacklets 2 by Taylored Dies and Nesting Circles & Nesting Scalloped Circles
          by Lifestyle Crafts.  The card shape is made using a large Frilly Square #2 by Go Kreate.
     Inked Edges - Distress Ink Vintage Photo
     Sparkle & Shine - Stickles Star Dust and Glossy Accents by Inkssentials
     My Stash - Ribbon and Pearls

Colored in Copics:  Bear - Dotted E30, E31, E33, E35     Blue - BG70+BG18, BG18
Red - R24, R27, R37, R39     Yellow - YR20, Y21, Y11     Green - YG91, YG93, YG95, YG97
Grey Shading - C00

Thanks so much for stopping by...
Have a Great Day!
Hugs...


Tuesday, December 4, 2012

3D Snowman Card - Teddy with Penguin


Hi and Good Afternoon,

Today, as promised yesterday, I am posting my second 3D Card.  This one was a bit harder than the first because it required so many more 3D layers but I really like how it turned out.  I again used the Shape EZ Snowy Ball Card from Whimsy Stamps.  I love these Shape EZ Cards...I'm going to pop on over to there web site and buy some more!!! 

Here is my card for today...Enjoy,


Front
Side so you can see the 3D effect
Inside

My Card Recipe:

Card Template - Shape EZ Snowy Ball Card by TLC with Whimsy
Stamps - Teddy with Penguin & Christmas Sentiment Tags by Lily of the Valley and Very Merry
     Christmas by Hero Arts
Ink - Black Momento
Paper - Bazzill White and Handmade Holiday 6x6 Paper Pad by Simple Stories
Flowers - Wild Orchid Crafts and Petaloo
Paper Punches - Snowflakes are Martha Stewart Aspen, Artic and Glacial
Metal Die - Christmas Stacker Tree by Dees Distinctively A Cut Above, Spruce Sprig & Bon
Voyage Foliage & Vintage Leaf from DooHickey
Inked Edges - Distress Ink Vintage Photo & Stormy Sky
Sparkle & Shine - Stickles Star Dust and Glossy Accents by Inkssentials
My Stash - Ribbon, Doily and Pearls

Colored in Copics:     Bear - E30, E33, E35     Red - R24, R27, R37, R39
Grey - C4, C6, C8    Orange - Y17, Y39     Snow - B0000     White Shadow - C00, C2, 0 Blender

3D Instructions - By Mariska Van Der Veer found in the Whimsy Stamps Inspirations Magazine dated December 2011 - Issue 5.

3D Background Under Pieces is Copic W5
3D Pieces were outlined using Copic W10
3D Glue is made by OLBA and called Lijm Kit...I bought this from Whimsy Stamps


Thanks for stopping by...
Hugs...


Monday, August 27, 2012

Fun Birthday!

Hello Friends...I just received my newest shipment of sentiments from Lily of the Valley!  It was such good timing as I was just finishing up my newest birthday card and was able to add the cutest "Sentiment Tags" to the front.  I just love these...they are a perfect size and sooooo cute!

This card is made using the "Fun Birthday" bear also from Lily of the Valley.  These little bears are just the cutest!  I have now made three cards using three different bear scenes and have two more scenes left to color.  I used another 6x6 paper pack this time from Bazzill Basics Paper.  I've become obsessed with the 6x6 paper packs because they are so easy to use and already color coordinated.  I'm up to about 48 different packs...I think I'm now officially a paper pack hoarder!!!  I just can't help myself!  Is there anyone else out there doing the same thing?  I'm sure there is!  I can't be the only one!  LOL!!!

Anyway...here is my newest card!

Enjoy...

Front
Inside
Copic Coloring Up-Close

My Project Recipe:
     Stamps - "Fun Birthday" by LOTV, "Sentiment Tags" by LOTV and "Greetings" by TCP Greetings
     Paper - Bazzill White, Blue/Green and "Vintage Marketplace 6x6 paper pack"
     Flowers - Wild Orchid Crafts and Prima (Prima Flower has been layered with Twinklets Diamond Dust)
     Paper Punches - "Dotted Scallop" by EK Success and "Pine Branch" by McGill
     Metal Die - "Labels 22 & Lacy Squares" by Spellbinders, "Riveria Corner" by Memory Box and
          "Heart Swirl" by DooHickey
     Inked Edges - Distress Ink "Vintage Photo"
     Sparkle & Shine - Stickles "Star Dust" and Glossy Accents by Inkssentials
     My Stash - Ribbon, Lace, Pearls and Gems

Colored in Copics:  Bear is Dotted using E30, E31, E33, E35     Light Pink RV00, R81, R83
Pink 0+R32, R32, R34     Light Blue BG0000, BG10, BF32     Blue Outline/Sky 0+ BG0000
Tags E50, E53     Butterfly Y0000, RV00, R81     Green YG01, YG03, G21

Thanks for stopping buy!

Hugs...Patti


Saturday, August 25, 2012

Patchwork Balloons

Good Morning!  It's a lovely Saturday morning and my grand kids are coming this afternoon...I'm so excited!  I won't have any time to color...haha...but love it when they come to visit!  Grandpa got the pool heated and I bought Kaelyn a new Dream Catcher for her room here!  She said she needed one here (already bought her one for her bedroom at home) because it helps to keep her bad dreams away!  Anything to help with those bad dreams!!!!

Today I have the cutest little bear holding a bunch of patchwork balloons to show you!  It's a stamp from Lily of the Valley and is from their newest bear stamp release.  You can find their shop by clicking on their name in my favorite web shops list on my side bar.  Check them out...they have the cutest stamps and sentiments.  Their shop is in England but they ship quickly and it doesn't really take long before they arrive...I think my last order I received within two weeks of placing my order.  This week I ordered some of their newest sentiment tags...I can't wait to use them!

Here's my newest card...enjoy!

Front
Inside
Close-up Copic Coloring

My Project Recipe:
     Stamps - "Patchwork Bunch of Balloons" by Lily of the Valley and "Greetings" by TCP Studios
     Paper - Bazzill White & Red - "Summer Fresh 6x6 Paper Pad" by Simple Stories
     Flowers - Wild Orchid Crafts and Prima
     Paper Punches - "Doily Lace" by Martha Stewart
     Metal Die - "Classic Oval Sm & Classic Oval Scalloped Sm" by Spellbinders, "Bloomy Tag, Vintage
          Leaf & Bon Voyage Foliage" by DooHickey, and "Leafy Branch" by CC Design
     Inked Edges - Distress Ink "Vintage Photo"
     Sparkle & Shine - Stickles "Star Dust" and Glossy Accents by Inkssentials
     My Stash - Ribbon, String, Charm & Pearls
     Sky - lightly sponged using Memento "Summer Sky"

Colored in Copics:  Bear  E40, E41, E42, E43, E44     Paws R11, R22     Red  R11, R21, R22, R24
Gold  Y32, Y23, Y21 topped with Y11     Blue Jean  B91, B93, B95, C4     Blue Dots  B91, B93, C4
Blue/Green  BG70, B52, BG72     Green  G82, YG17

Thanks for stopping by...

Hugs...Patti

Tuesday, August 21, 2012

Present Trio Bears

Hi Friends!  Today I have a pretty little pink and brown card that I used with a new set of stamps that I bought from Lily of the Valley.  Oh how I adore these little bears!  I also have a set of 3 bears with flowers which I might color up for a card next week???  Don't you love pink and brown together?  I do!

I really like using these 6x6 paper packs because they have already coordinated all the papers and colors for you.  There is no guess work involved so it makes it very quick and easy to make a card.  I swear it saves me one whole day just not having to go through my stash of papers (which is very large) and decide on colors and patterns.  I also love that the patterns are made at a smaller scale which is super when you are using them for a small project like a card.

Here is my card...hope you like it!

Front
Inside
Pull-out Tag
Close-up of Copic Coloring

My Project Recipe:
     Stamps - Lily of the Valley "Present Trio", CC Designs "Thinking of You" and Penny Black "Gratitude"
     Paper - Bazzill White and Authentique "Lively 6x6 Bundle"
     Flowers - Wild Orchid Crafts and Recollections
     Metal Die - Spellbinders "Lacey Circles S4-293 & Blossom", Life Style Crafts "Nesting Scallops &
          Nesting Circles", DooHickey "Scalloped Tag & Butterfly Dreams" and Cherry Lynn Designs
          "Butterflies"
     Inked Edges - Distress Ink "Walnut Stain & Frayed Burlap"
     Sparkle & Shine - Stickles "Star Dust", Liquid Pearls by Ranger and Glossy Accents by Inkssentials
     My Stash - Ribbon, String, Charm, Pearls & Gems
     Film Strip by Tim Holtz

Colored in Copics:  Bears E40, E42, E44     Tag RV0000, RV00 - Heart R81, R83
Ears RV00, RV11     Paw R20, R22     Presents R81, R83, R85

Thanks for visiting...

Hugs...Patti


Saturday, August 18, 2012

A Basket of Roses Gift Card Holder

Hi...Happy Saturday!  Today I have a cute gift card holder to show you.  It's a larger version of a gift card holder from a restaurant that I received as a gift.  I can't remember what restaurant it was but the holder was so cute...I made it larger and made a card to fit inside of it.  The original opening in the front was a small circle but I used a Spellbinders Label 18 die for mine.

I received my order from Lily of the Valley Monday and was so excited I just had to use one for this project.  I bought the cutest girls and bears from there.  This little girl is one of them, she is called "Basket of Roses".  I love love love her!  I'll be making some cards later using the bears too...they are soooooo cute!

Here's the card holder...hope you like it...

Card Holder with Cutout

Card Front
Inside of Card with a Starbucks gift card inserted into pocket

My Project Recipe:
     Stamps - Lily of the Valley "Basket of Roses" and Stempelglede "Grunge Flourish Hearts"
     Sentiment Stamps - Penny Black "Gratitude", LOTV "Dreamy Days Circular Sentiments" and Verve 
          "Amazing Wishes"
     Paper - Bazzill White and Hero Arts 6x6 paper pack "Piccadilly"
     Flowers - Wild Orchid Crafts, Petaloo and Recollections
     Paper Punches - Leaves by Martha Stewart, Little Flowers by Punch Bunch
     Metal Die - Spellbinders "Label 18" & "Label 4", Quickutz "Photo Corner" and Lifestyle Crafts 
          "Nesting Circles" & "Nesting Scallops"
     Bird Cage - Zumma Crafts
     Inked Edges - Distress Ink "Vintage Photo"
     Sparkle & Shine - Stickles "Star Dust" and Glossy Accents by Inkssentials
     My Stash - Ribbon, Lace, Strings & Pearls
     Clouds - Sponged using my own template and Momento "Summer Sky"

Colored in Copics:  Hair  E43, E44, E59          Face  E0000, E00, E11, RV11      Pink  R81, R83, R85
Yellow  Y0000, Y21      Blue  B91, B93, B95      Green  G20, G82      Butterfly  Y11, R20
Grounding  E40, E41, E43      Basket  E30, E31


Bye for now...Thanks for visiting
Hugs...Patti